This guide explains how to recover assets mistakenly sent to a Gnosis Safe multi-sig wallet on the wrong network. The underlying principle is that, due to the way EVM-compatible multi-sig wallets are generated, a similar address can be recreated on the correct chain using the original deployment data.
The Story (Original Author’s Experience):
The author recounts their experience of accidentally sending assets to the wrong network on their Gnosis Safe. After initially struggling to find a solution, they consulted with experts and eventually found an article that provided the necessary steps to recover the funds. This experience highlights the importance of double-checking network compatibility before sending any transactions.
Key Principle:
EVM-based multi-sig wallets, while implemented via smart contracts, have address generation algorithms similar to regular wallets. If you control the original multi-sig wallet, there’s a good chance you can recover your assets. This involves using the original deployment data to recreate the same multi-sig address on the correct chain using MetaMask.
Recovery Steps:
1. Find the ProxyFactory Address:
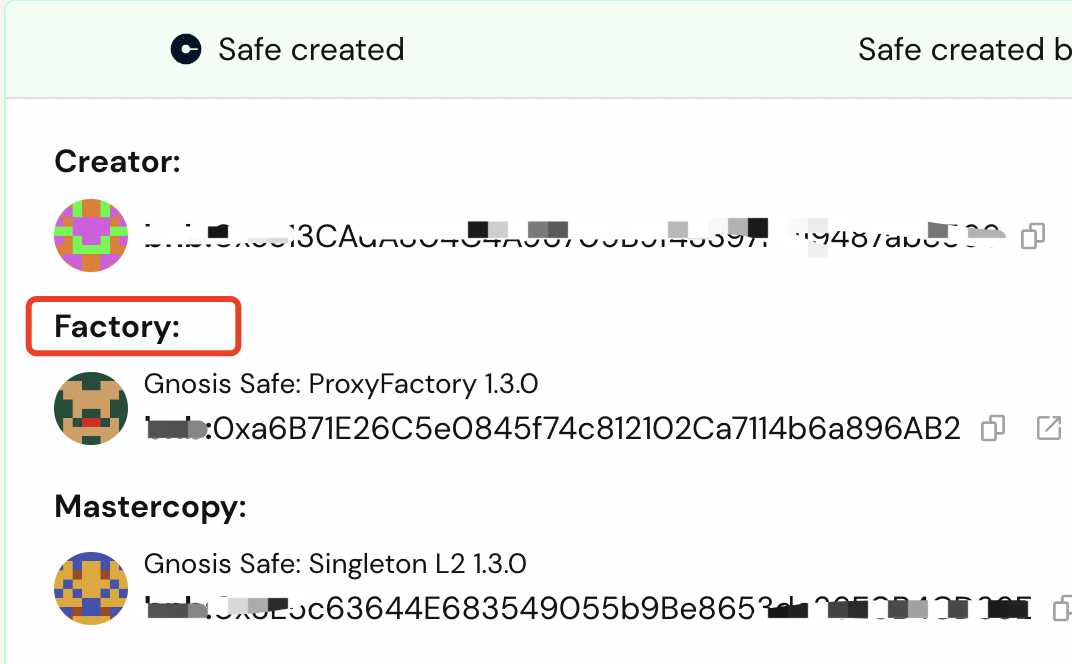
Confirm that your Safe version is v1.3.0, as this version has the required ProxyFactory address.

This address can be found in the first transaction record of your multi-sig wallet (the deployment transaction). Look for the transaction on a block explorer like Etherscan.
2. Copy the Input Data of the Multi-Sig Wallet Creation Transaction:
Open the deployment transaction on Etherscan.
Locate the “Input Data” field.
Click “View Input As Original (Hex).”
Copy the hexadecimal code.
3. Send the Copied Input Data to the Factory Address on the Target Network:
Crucial Prerequisite 1: Verify Factory Address Consistency:
It’s essential to confirm that the Factory address on the target network is the same as the one on the Ethereum mainnet.
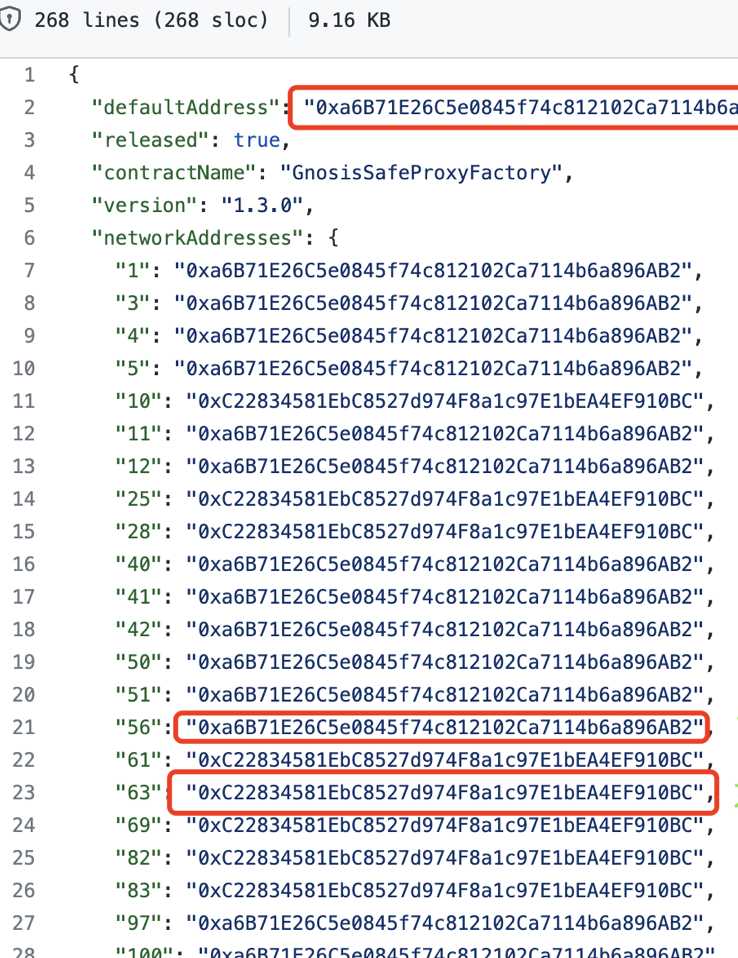
Check this by referring to the proxy_factory.json file on the Safe Deployments GitHub repository: https://github.com/safe-global/safe-deployments/blob/main/src/assets/v1.3.0/proxy_factory.json
Compare the chainID and the Factory address for the target network with the Ethereum mainnet address. Most EVM-compatible chains use the same address, but some may differ. If the addresses are different, recovery using this method is unlikely.
Crucial Prerequisite 2: Enable Hexadecimal Display in MetaMask:
In MetaMask settings, go to “Advanced” and enable “Display hexadecimal data.”
Perform the Transaction:
Open MetaMask and switch to the network where you want to recreate the multi-sig wallet (e.g., BSC if you’re recovering BSC assets).
Initiate a transaction to send 0 units of the native currency.
Paste the Factory address (from Step 1) into the recipient address field.
Paste the hexadecimal Input Data (from Step 2) into the data field.
Confirm and send the transaction.
4. Verify Asset Recovery:
After completing these steps, a new multi-sig wallet with the same address as your original Ethereum mainnet wallet will be created on the target network (e.g., BSC). You can then check your balance on the Safe app for that network: https://app.safe.global/{network}:{address}/balances (e.g., https://app.safe.global/bnb:{address}/balances).
Example: If your Safe address is 0x123… and you sent BNB to it on the Ethereum Mainnet by mistake, you would switch MetaMask to the BSC network, send a 0 BNB transaction to the Factory address with the correct input data. This would create 0x123… on BSC, and your BNB should be accessible there.
Conclusion:
This method allows recovery in many cases of cross-chain transfer mistakes with Gnosis Safe. However, always exercise caution and send a small test transaction first to avoid such issues. This greatly reduces the risk of significant financial loss due to simple errors.

